Saturday, September 15, 2012

knockout.composite: Parting Thoughts and Future Directions

*UPDATE* Tribe is here! Check out http://tribejs.com/ for guides and API reference.

This is the final part of a multi-part series. Check out some of the earlier posts if you haven’t already.

Part 1: Introducing knockout.composite
Part 2: The Basics
Part 3: Getting Around
Part 4: Putting it All Together
Part 5: Unit Testing: Model Citizens 
Part 6: Integration Testing: Playing Nicely Together
Part 7: Functional Testing: Automated UI Tests, Anywhere, Any Time
Part 8: Pack Your App and Make it Fly
Part 9: Parting Thoughts and Future Directions


Finally! We’re at the end of the series! Some parting thoughts before we call it a day…

First and foremost, knockout.composite is a version 0.1 product. It is being used in a production application with great success and stability, but it is not without it’s shortcomings.

The current version is a gradually evolved product and the need for a significant rewrite increases with each added feature. Some of the separate modules are quite tightly coupled; this could be significantly reduced with a better design. Subtle temporal couplings in panes can also be quite difficult to debug.

All this aside, we think even the current version knockout.composite offers some brilliant features and makes building high performance single page web apps easier than ever before. The next version will offer improvements in every area with increased flexibility and extensibility. If you’re interested in contributing, send me a tweet and we’ll take it from there.

*UPDATE*: v0.2 is coming, and it’s part of a much bigger vision we want you to see – get a glimpse here.

What’s Coming?

Devices, Devices, Devices

As mentioned in part 1, we think knockout.composite has great potential within the hybrid web / native mobile application space. Our focus over the next few months is to fine tune the whole experience for mobile devices and develop a set of themes for each operating system. Think single, highly testable codebase for every device, with the bonus of decent performance.

SOA

The composite application pattern is ideal for service oriented architectures. A autonomous business service can easily “own” application components and have them stitched in to applications simply and easily. Seamlessly integrating client and server side message buses makes developing client applications for message based architectures a breeze.

We’ll be releasing libraries to enable this seamless integration between knockout.composite and a range of messaging platforms, like NServiceBus, Azure Service Bus, etc.

Control Libraries

We’ve already got a stack of reusable controls, we intend to release these under an open source license for use in your application. CSS drives the look and feel, so customising each is straightforward.

Amongst Other Things…

Like state machines for navigation, extensible support for validation libraries, better memory management and debugging support, more out of the box transitions, more flexibility and extensibility. The list goes on.

Stay Tuned!

In the meantime, drop me a line and let me know what you think, get involved and help make the web a better place to develop.

knockout.composite: Pack Your App and Make it Fly

*UPDATE* Tribe is here! Check out http://tribejs.com/ for guides and API reference. PackScript also completely supersedes resPack – more details at http://packscript.com/.

This is part 8 of a multi-part post. It’s assumed that you have a basic knowledge of the data binding and observability features of knockout.js and have read the example presented in part 4.

Part 1: Introducing knockout.composite
Part 2: The Basics
Part 3: Getting Around
Part 4: Putting it All Together
Part 5: Unit Testing: Model Citizens 
Part 6: Integration Testing: Playing Nicely Together
Part 7: Functional Testing: Automated UI Tests, Anywhere, Any Time
Part 8: Pack Your App and Make it Fly
Part 9: Parting Thoughts and Future Directions


Throughout this series of posts, we have completely ignored performance. As far as rendering goes, the framework does not add significant overhead. How you use knockout and how you structure your HTML and CSS have a far bigger impact on performance.

What about loading resources? You may have noticed in the examples that we’re generating quite a large number of HTTP requests, and well… they’re pretty slow in the grand scheme of things.

The examples are also fairly trivial, what happens when we have 30 panes on a single screen? 3 requests per pane (html / js / css) gives a total of 90 HTTP requests, just to display one screen!

Enter resPack

resPack is a small .NET console application that combines and minifies JavaScript and CSS files based on simple XML configuration files. It

  • provides simple templating capabilities that allow us to inject things like the source file path (hello, sourceURL tag),
  • has a “watch” mode where it will execute immediately when files change, giving us the ability to keep our code in separate files but still have a simple save-refresh debugging experience,
  • executes recursively, so we can be working in a separate library, save, refresh our app that depends on it and all is kept up to date,
  • uses the Microsoft AjaxMin library for minification. It’s quite efficient and causes minimal side effects.

Let’s look at some example configuration files.

Basic Options
<resPack>
  <output filename="../Content/Panes.css">
    <include files="*.css" recursive="true" />
    <exclude files="Common\*.css" />
  </output>
</resPack>

I don’t think I need to explain this.

Minifying

This is currently only supported for JavaScript files, but the AjaxMin library does support CSS, so this feature will be added soon.

<output filename="../Content/Panes.js" minify="true">
  <include files="*.js" recursive="true" />
</output>

An option on the output turns minification on. This will generate an additional file with the extension .min.js, in this example, Panes.min.js.

A Template for Templates
<output filename="../Content/Panes.htm">
  <include files="*.htm" recursive="true" />
  <template>
&lt;script type="text/template" id="Panes-{2}">{0}&lt;/script>
  </template>
</output>

This combines all of our HTML files for our panes and wraps them each in a script tag. The {0} token substitutes the actual file contents and {2} substitutes a formatted version of the path suitable for HTML attributes.

A Special Case for Models

For our models, we need to tell knockout.composite the path to the model and add in the sourceURL tag to enable debugging support in Chrome.

<output filename="../Content/Panes.js" minify="true">
  <include files="*.js" recursive="true" />
  <template>
{0}
ko.composite.resources.assignModelPath('/{3}');
//@ sourceURL=/Panes/{1}
  </template>
</output>


Loading it All Up

Now we’ve got our combined and minified files, how do we load them up? For CSS, we don’t need to do anything special, just add the usual link element in your header. We can also do this for our models, but we lose debugging support. This is perfectly acceptable for production.

knockout.composite gives us a simple initialise helper function that will load up these resources and begin the rendering process.

ko.composite.initialise(null, { scripts: ['/Content/Debug.js'], templates: ['/Content/Site.htm'] });

This ensures our models are loaded up with full debugging support and our templates are loaded and rendered to the header of the page. To achieve full debugging support, the framework splits JavaScript files based on the sourceURL tag and executes each script in a separate eval statement.

At this stage, Chrome is the only browser that provides full debugging support. Firebug apparently supports the sourceURL tag, but it doesn’t work in this case and I haven’t had the time to determine why. For other browsers, it makes debugging significantly easier turning this option off.

ko.composite.options.debug.splitScripts = false;

This will leave all of our script in a single file, allowing us to use the debugger’s search function to locate specific sections of code and place breakpoints.

Being Selective

Loading up your entire app up front works great for small to medium applications, but as they start to grow, file sizes may start to cause unacceptable load times. We can selectively leave out panes from our resPack configuration files. If a resource isn’t loaded on startup, it will be dynamically loaded when required.

The next version of knockout.composite will provide a mechanism for specifying different load strategies, such as a basic subset up front, by folder when requested, and even in the background after your app has fully loaded.

Make it Fly

As all of our application resources are static text files, there are some things we can do to really boost load times.

Gzip Compression

Most web servers can be configured to compress static text files on first request and transmit the gzipped version. Since our files are plain text, this is a significant saving. IIS requires special configuration to force it to compress on first request. Stackoverflow has the answers…

Deploying to a CDN

A Content Delivery Network replicates your files on a number of servers around the world that are strategically located to minimise the number of hops required for users in various places around the world.

Be aware that this introduces a number of complexities around deployment and versioning. It also requires your service layer to support cross domain requests, though JSONP makes this relatively simple.

Conclusion…

The tool is available in the Tools folder in the knockout.composite github repository. I have not yet released the source, but will do so soon, tweet me if you’re interested. The code is in need of an overhaul and I’d like to be able to specify configuration in JSON format as well as XML.

Next up, finally, a conclusion. Of sorts. For now.

knockout.composite: Functional Testing: Automated UI Tests, Anywhere, Any Time

*UPDATE* Tribe is here! Check out http://tribejs.com/ for guides and API reference.

This is part 7 of a multi-part post. It’s assumed that you have a basic knowledge of the data binding and observability features of knockout.js and have read parts 4 through 6.

Part 1: Introducing knockout.composite
Part 2: The Basics
Part 3: Getting Around
Part 4: Putting it All Together
Part 5: Unit Testing: Model Citizens 
Part 6: Integration Testing: Playing Nicely Together
Part 7: Functional Testing: Automated UI Tests, Anywhere, Any Time
Part 8: Pack Your App and Make it Fly
Part 9: Parting Thoughts and Future Directions


The JavaScript / HTML / CSS stack also makes it quite easy to perform automated UI testing – simply open your deployed app in an iframe element and we can then manipulate the UI with JavaScript, all driven by your favourite unit testing framework. This works very well in practice. Check out the yoursports.net functional test suite here and here. Click on each test to see the series of steps that was performed.

knockout.composite gives us an additional layer of useful stuff to plug into. Using the rendered and paneRendered events that are published on the event bus, we can ensure that our application is ready for manipulation and assertions.

A significant challenge to overcome is dealing with the asynchronous nature of applications. Trying to write this stuff in a procedural style with JavaScript ends up being a deeply nested mess of callbacks and deferred objects.

Instead, creating an API and specifying tests as a set of steps that are queued up and executed serially is a much simpler approach, and also allows reusing these sets of steps. Here is an example from the yoursports.net test suite.

var logon = [
    click(tabButton('Log On')),
    waitForVisible('.logon'),
    setValue('.logon input:eq(0)', 'demo'),
    setValue('.logon input:eq(1)', 'qweqwe'),
    click('.logon button:contains("Log On")'),
    waitForPane('/Team/details')
];

var logoff = [
    click(tabButton('Account')),
    waitForVisible('.account'),
    click('.account a:contains("Log off")'),
    waitForNotVisible('.contentHeader a:contains("Enter Scoresheet")')
];

functionalTest('Logon / Logoff', [
    logon,
    textEqual('.heading:eq(0) span', 'Team: Hit and Run', 'Correct team loaded'),
    logoff
]);

We can see that the API consists of a bunch of functions that correspond to either actions or assertions, and an entry point function, functionalTest.

Under the Covers

The functionalTest function performs all necessary setup for the test, primarily creating the iframe and waiting for our application to finish rendering. It accepts a test name and an array of steps. Each step can be either another array of steps or a function that returns another function to be queued for execution later.

If you’re not familiar with JavaScript, that might sound a bit confusing, but it is one of the powerful features of the language. For an in depth discussion of function currying in JavaScript, check out this Crockford article.

The functionalTest function also ensures that qunit if started once all steps have completed or an uncaught exception occurs.

Step by Step

So each individual step consists of a function that returns a function. Let’s have a look at an example.

function setValue(selector, value) {
    return function () {
        singleExists(selector)();
        ok(true, "Setting value of '" + selector + "' to " + value);
        $$(selector).val(value).change();
    };
};

This example sets the value of an element with a specified selector. The initial setValue call “loads up” our internal function with the necessary arguments and returns the internal function to the test framework for execution in series.

The singleExists function is another “step” function that asserts that only one and only one element exists with the specified selector. The $$ variable gives us access to the jQuery instance inside our iframe.

We can also return a jQuery deferred object from each step and the test framework will wait until the deferred is either resolved or rejected. We can use this to wait for specific events like rendering completion and elements becoming visible, etc. The implementation is somewhat beyond the scope of this article.

Builds, Environments and Browsers

The yoursports.net tests are run against a deployed service layer and a predefined set of data, so we are testing the integration of the entire system, from UI through to the data store. They can easily be deployed with the application and run as part of a build, targeting any environment and run from multiple browsers.

Part of the roadmap is for a simple test agent that can execute these tests in multiple browsers, taking screenshots at specified points in time, gather timings and provide an interface for reporting results.

Conclusion

I have to say at this point that this is still in an experimental stage. While it does work well, it can be somewhat painful to debug. Subtle temporal couplings can make things incredibly confusing! This will improve drastically in the next version of knockout.composite.

I have not yet made the source code for this available on github, but will do so in the near future. If you’re particularly keen, drop me a tweet.

Next time, the last piece, at least for now. Phew!

Thursday, September 13, 2012

knockout.composite: Integration Testing: Playing Nicely Together

*UPDATE* Tribe is here! Check out http://tribejs.com/ for guides and API reference.

This is part 6 of a multi-part post. It’s assumed that you have a basic knowledge of the data binding and observability features of knockout.js and have read parts 4 and 5.

Part 1: Introducing knockout.composite
Part 2: The Basics
Part 3: Getting Around
Part 4: Putting it All Together
Part 5: Unit Testing: Model Citizens 
Part 6: Integration Testing: Playing Nicely Together
Part 7: Functional Testing: Automated UI Tests, Anywhere, Any Time
Part 8: Pack Your App and Make it Fly
Part 9: Parting Thoughts and Future Directions


The JavaScript / HTML / CSS technology stack has some serious advantages over traditional desktop technology stacks when it comes to testing, particularly the fact we can run our tests in any browser, from anywhere, in any environment (dev / test / prod / etc) and with no extra software. Additionally, the highly integrated nature of JavaScript and HTML make it trivial to perform assertions against rendered markup.

So what exactly do I mean by integration testing?

knockout.composite allows us to render a single pane into any element. This may consist of a number of child panes, so we can test the interactions between these panes. We can also make assertions about the rendered UI, testing the integration between models and views. Let’s have a look at some examples.

Some infrastructure…

Before we start rendering panes and making assertions against results, we need a mechanism for rendering the pane and waiting for the render operation to complete before performing any assertions. Unfortunately, due to some calls to setTimeout, we lose the ability to run our tests synchronously, so we need to make use of qunit’s support for asynchronous tests.

We’ll use the addPane utility function to render the pane and then wait for the childrenRendered message to be published before we start making assertions.

function render(options, tests) {
    var pane = ko.composite.utils.addPane($('#qunit-fixture')[0], options);
    pubsub.subscribe('childrenRendered', function () {
        tests();
        start();
    });
    return pane;
};

You can see the tests in action here.

A simple test

We’re going to perform some integration tests against the webmail sample we built in part 4. We can use the same configuration file and index.html as we did for unit testing. Let’s see how it works.

asyncTest("Folders pane renders the correct number of buttons", function() {
    render('folders', function() {
        equal($('.folders li').length, 4);
    });
});

Looks pretty simple. Render the pane. Make sure there are four list items.

Interacting with the UI

Since we’ve got our pane rendered and sitting there in our browser, why not poke it a bit?

asyncTest("Clicking a folder name sets the selected class", function () {
    render('folders', function () {
        ok($('.folders li:contains("Sent")')
            .click()
            .hasClass('selected'));
    });
});
Accessing the model

The pane object exposes a model property that contains the underlying model. Use this if you want to make assertions against the model after rendering the pane.

asyncTest("Clicking a folder name sets the selectedFolder property", function () {
    var pane = render('folders', function () {
        $('.folders li:contains("Sent")').click();
        equal(pane.model.selectedFolder(), 'Sent');
    });
});

Accessing the model of child panes can be done by using the knockout function ko.dataFor.

Doing More

That’s all I’m going to show for now, but this is just a small taste of what can be tested with this approach. See the tests in action here.

Next Up!

Next post, we’re going to take a quick look at some complete, automated, end to end functional testing for your application.

Wednesday, September 12, 2012

knockout.composite: Unit Testing: Model Citizens

*UPDATE* Tribe is here! Check out http://tribejs.com/ for guides and API reference.

This is part 5 of a multi-part post. It’s assumed that you have a basic knowledge of the data binding and observability features of knockout.js and have read part 4.

Part 1: Introducing knockout.composite
Part 2: The Basics
Part 3: Getting Around
Part 4: Putting it All Together
Part 5: Unit Testing: Model Citizens 
Part 6: Integration Testing: Playing Nicely Together
Part 7: Functional Testing: Automated UI Tests, Anywhere, Any Time
Part 8: Pack Your App and Make it Fly
Part 9: Parting Thoughts and Future Directions


knockout.composite gives you the ability to easily unit test your individual models, test the integration between panes and perform full functional testing of your application, all from within a browser.

This post covers the first of these – unit testing your models. We’ll be using qunit (the JavaScript unit testing framework used by jQuery), the excellent sinon.js mocking library and mockjax for stubbing out ajax calls.

Unit Testing Your Models

For this example, we’re going to write some tests against models from the webmail sample we wrote in part 4. You can see the tests in action and the complete source for the tests on github.

The index.html file contains the necessary script and CSS references to fire up qunit and knockout.composite.

As we’re testing panes from the webmail sample, we need to let knockout.composite know where to load panes from. We’ll also tell it to load things synchronously. This simplifies our tests considerably. We’ve put this in a separate configuration file in the Resources folder.

ko.composite.options.basePath = '../6. Webmail/4. The Final Pieces/';
ko.composite.options.synchronous = true;
Creating models

So how do we load up our model and create an instance of it? The ko.composite.resources namespace contains a function called loadModel that loads the model for us, then we can just create an instance of it. Remember, model constructors take three arguments – pubsub, data, pane.

ko.composite.resources.loadModel('folders');
var model = new ko.composite.models['folders'].constructor(pubsub, data, pane);

We’ve separated that out into a helper function called createModel to simplify our code a bit.

A simple test

This is a simple test against the model for the folders pane. It asserts that the value of an observable changes when the selectFolder function is called.

test("selecting a folder sets selectedFolder observable", function () {
    var pubsub = { publish: function () { } };
    var model = createModel('folders', pubsub);
    model.selectFolder('Sent');
    equal(model.selectedFolder(), 'Sent');
});

Pretty simple stuff. Create the model, call the selectFolder function and assert that the value of the selectedFolder observable has been set. The pubsub variable is created because we know that the selectFolder function calls the pubsub.publish function. If this function doesn’t exist, an exception will occur.

Making sure messages are published

A sinon spy is perfect for this. This time, instead of an empty function, we’ll attach a spy to the publish function. The spy gives us access to information about calls made and arguments passed.

test("selecting a folder publishes folderSelected method", function () {
    var pubsub = { publish: sinon.spy() };
    var model = createModel('folders', pubsub);
    model.selectFolder('Sent');

    ok(pubsub.publish.calledOnce);
    equal(pubsub.publish.firstCall.args[0], 'folderSelected');
    equal(pubsub.publish.firstCall.args[1], 'Sent');
});

Our spy has replaced the publish method, so we can assert that the selectFolder function also publishes the folderSelected message with appropriate arguments.

Testing message subscribers

This time, we’re going to test the layout model and it’s message subscription functions. To invoke these, we can create a real instance of pubsub, pass it to the model constructor and call the publish method. We’ve also mocked out the pane.navigate function with a spy.

test("model navigates when folderSelected message is published", function () {
    var pubsub = new PubSub({ forceSync: true });
    var pane = { navigate: sinon.spy() };
    var model = createModel('layout', pubsub, null, pane);
        
    pubsub.publish('folderSelected', 'Sent');
    ok(pane.navigate.calledOnce);
    equal(pane.navigate.firstCall.args[0], 'mails');
    deepEqual(pane.navigate.firstCall.args[1], { folder: 'Sent' });
});
Mocking AJAX calls

Last little trick – stubbing out your AJAX requests with mockjax. This is not actually part of knockout.composite, but is useful enough to warrant a mention here. This test exercises the initialise function of the mails pane.

test("initialise loads specified folder and sets data observable", function () {
    $.mockjax({
        url: '../data/folder/Sent',
        responseText: JSON.stringify({ test: 'test' }),
        responseTime: 0
    });

    var model = createModel('mails', null, { folder: 'Sent' });
    model.initialise();
    deepEqual(model.data(), { test: 'test' });
});

Again, pretty simple stuff. Set up the AJAX call, create the model, call stuff, test stuff.

Check the running tests out here.

Until Next Time…

Integration testing up next. See you then!

Thursday, September 06, 2012

knockout.composite: Putting it All Together

*UPDATE* Tribe is here! Check out http://tribejs.com/ for guides and API reference.

This is part 4 of a multi-part post. It’s assumed that you have a basic knowledge of the data binding and observability features of knockout.js.

Part 1: Introducing knockout.composite
Part 2: The Basics
Part 3: Getting Around
Part 4: Putting it All Together
Part 5: Unit Testing: Model Citizens 
Part 6: Integration Testing: Playing Nicely Together
Part 7: Functional Testing: Automated UI Tests, Anywhere, Any Time
Part 8: Pack Your App and Make it Fly
Part 9: Parting Thoughts and Future Directions


We’ve now seen some of the basic ways to use knockout.composite, so let’s build something functional with it. If you’ve run through the knockout.js webmail tutorial, you might be getting some deja vu very shortly! We’re going to replicate this using knockout.composite – you can check out the final version here.

So, either grab the source and head to the “Examples/6. Webmail” folder where you’ll find the code for each step, or head to github and view the source online. We’ll also post links to the working version of each step.

Again, it’s highly recommended using Chrome as you work your way through, you’ll find it much easier to see things working in the dev tools. If you are tinkering and have troubles getting things working, the console is your friend. knockout.composite dumps a bit of stuff there and you can see any errors that may have occurred.

Piece By Piece

Let’s build our components one by one.

Show Me Some Folders

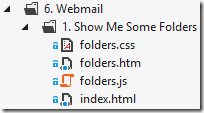
If you look at the first step in the example folder, we’ve added a boilerplate index.html and some placeholders for our first pane.
Webmail1

Let’s have a crack at a model.

ko.composite.registerModel(function (pubsub, data, pane) {
    this.folders = ['Inbox', 'Archive', 'Sent', 'Spam'];
    this.selectedFolder = ko.observable('Inbox');
});

Pretty simple stuff. An array of folder names and an observable to hold the selected one. The template?

<ul class="folders" data-bind="foreach: folders">
    <li data-bind="text: $data, 
                   css: { selected: $data === $root.selectedFolder() }, 
                   click: $root.selectedFolder"></li>
</ul>

OK. Give me a list element with a list item for each array item in folders. Set the “selected” CSS class if the selectedFolder property matches the current folder name. When we click, chuck the value in the selectedFolder property.

No worries, mate! See it here.

What’s in a Folder

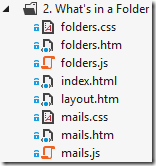
So now we’re going to build a grid to display the list of emails in each folder. This time, since we’re dealing with more than one pane, we’ve added a simple HTML only layout pane as well as the one for viewing the contents of the folder.
Webmail2

The template for the mail grid is pretty straightforward. Table, couple of bindings, whatever. Let’s have a look at the model.

ko.composite.registerModel(function (pubsub, data, pane) {
    var self = this;

    self.data = ko.observable();

    pubsub.subscribe('folderSelected', function(folder) {
        $.getJSON('../data/folder/' + folder, self.data);
    });
});

When someone tells me via our pubsub event bus thing-o that they’ve selected a folder, let’s load it up and push it into an observable.

Cool, let’s rig up the model for our list of folders to do just that.

ko.composite.registerModel(function (pubsub, data, pane) {
    var self = this;
    
    self.folders = ['Inbox', 'Archive', 'Sent', 'Spam'];
    self.selectedFolder = ko.observable();

    self.selectFolder = function (folder) {
        self.selectedFolder(folder);
        pubsub.publish('folderSelected', folder);
    };

    self.childrenRendered = function() {
        self.selectFolder(self.folders[0]);
    };
});

The first thing you’ll probably notice over the previous version is the selectFolder function. Selecting a folder now consists of two things, setting the observable and publishing a message. This will now be the target of our click binding.

The second function, childrenRendered, is a special “lifecycle” function (described previously) that is executed automatically when all panes in the current rendering cycle have completed. In a nutshell, once we know the other pane is ready for our message, select a default folder.

Too easy! Check it out here.

You’ve Got Mail

Right. We wouldn’t have much of a webmail system if it didn’t let us read mail, would we?

Following the same pattern, let’s publish a message when we click on a row in the mails grid, but now we need to navigate to another pane to show the email. If we move our message subscribers up to the layout pane, we have a central place to trigger the navigation from. The layout pane becomes a kind of “controller” (a note about this pattern later in the post).

First of all, we need to set up the layout pane for navigation.

<div data-bind="pane: 'folders'"></div>
<div data-bind="pane: { handlesNavigation: true }"></div>

Then add a model for the layout pane and add the message subscribers.

ko.composite.registerModel(function (pubsub, data, pane) {
    pubsub.subscribePersistent('folderSelected', function(folder) {
        pane.navigate('mails', { folder: folder });
    });

    pubsub.subscribePersistent('mailSelected', function (mail) {
        pane.navigate('viewMail', { mailId: mail.id });
    });
});

Looks simple enough. When someone selects a folder, show the mails pane, when someone selects a mail, show the viewMail pane. We have to use subscribePersistent here or our subscriptions will be cleaned up when we navigate.

All we need now is for our mails pane to publish the mailSelected message when someone clicks on a row in the mails grid. Add a quick function to our view model…

ko.composite.registerModel(function (pubsub, data, pane) {
    var self = this;

    self.data = ko.observable();

    self.initialise = function () {
        $.getJSON('../data/folder/' + data.folder, self.data);
    };
    
    self.selectMail = function (mail) {
        pubsub.publish('mailSelected', mail);
    };
});

…and bind it to each table row…

<tr data-bind="click: $root.selectMail">

You’ll notice we also changed the call to pubsub.subscribe to an initialise function. Now that we’ll be navigating to this pane and passing in the folder name, we can use the initialise function to load up the data.

All that’s left is the pane to actually view the email. It’s pretty simple boilerplate stuff, not worth showing here, so have a squiz at what our app looks like now.

The Final Pieces

So you probably noticed by now, we ain’t got no back button or refresh support. As promised, this is a piece of cake. Adding a script reference to the jQuery hashchange library takes care of most of it, and will for most applications.

The data that is stored in the URL is used to reconstruct the navigation pane. Since the folders pane is outside our navigation pane, it also needs to remember which folder is selected. Applying the history observable extension to the selectedFolder observable makes this easy.

self.selectedFolder = ko.observable().extend({ history: { key: 'folder' } });

We’re also going to enable the “fade” pane transition. This is as simple as adding an option to our navigation pane declaration in layout.htm:

<div data-bind="pane: { handlesNavigation: true, transition: 'fade' }"></div>

So make sure that the pane is fully loaded and rendered before we fade it in, we’re also going to take advantage of a little trick – returning a jQuery deferred object (such as those returned by $.ajax) from the initialise model method will cause the framework to wait for the deferred to resolve or reject before completing the rendering operation. This is from mails.js:

self.initialise = function () {
    return $.getJSON('../data/folder/' + data.folder, self.data);
};

See it here.

Some Observations…

Publish / Subscribe

It’s worth noting we could have done away with the whole pubsub thing in the end. Instead of publishing messages, we could just call pane.navigate directly in the click event handlers. This would result in a bit less code, but using the messaging pattern decreases the coupling in our application.

When we added the viewMail pane, we significantly changed the behaviour of our application, but we didn’t need to change a single line of code in the folders pane. It’s a small win in such a trivial example, but on a significantly larger scale, it’s a significantly larger win!

“Controller” Pattern

The “controller” pattern described above is a simple and useful pattern, the handlers can be implemented and grouped wherever (it doesn’t have to be within a pane) and it promotes a bit of flexibility, but it doesn’t scale particularly well. I’m currently using finite state machines (machina.js) to control site navigation and multi-step user processes, and it’s awesome, fits well with the pubsub model. More in a future post.

More!

What would a JavaScript framework be without the obligatory todo app? TodoMVC have a great little todo app that’s been ported to a large variety of frameworks. Check out the knockout.composite version.

Next up, testing, from unit testing your models to functional testing your whole app, all hosted within a browser.

Tuesday, September 04, 2012

knockout.composite: Getting Around

*UPDATE* Tribe is here! Check out http://tribejs.com/ for guides and API reference.

This is part 3 of a multi-part post. It’s assumed that you have a basic knowledge of the data binding and observability features of knockout.js.

Part 1: Introducing knockout.composite
Part 2: The Basics
Part 3: Getting Around
Part 4: Putting it All Together
Part 5: Unit Testing: Model Citizens 
Part 6: Integration Testing: Playing Nicely Together
Part 7: Functional Testing: Automated UI Tests, Anywhere, Any Time
Part 8: Pack Your App and Make it Fly
Part 9: Parting Thoughts and Future Directions


So we know how to show some stuff on the screen. Cool, but every app has different places we can go, precisely how are we going to get there? If you’ve used knockout a bit before, you might have already guessed we can feed the pane binding handler an observable, and this is most useful, but we’ve got another way that has some extra sugar coating.

Navigation (demo)

Along the way to being rendered in elegant beauty, a pane also takes on a life… err… object of it’s own. This object is passed to the constructor of each model and exposes all sorts of useful stuff. In this case, we’re interested in the navigate method.

The navigate method looks pretty much the same as the binding handler. Give it a path and data or an options object.

pane.navigate('end', { value: self.value() });

This does a few funky things.

Well… Navigates!

The pane that has been marked as the “navigation” pane (read: content pane) empties out it’s contents and loads up the new pane. By default, this is the root pane in your application, but we can control this by passing the handlesNavigation option to our panes. This allows us to easily declare some static layout that remains in place for the life of the application.

Memory Management

First, as mentioned, it cleans up any message subscriptions the current pane might have left lying around.

Single page web apps, along with all their slick, juicy, sweetness, bring the age old issue of memory leaks to the browser. As our pubsub objects tend to live for quite some time, we need to make sure they don’t hold references to subscription functions on our models for any longer than required.

This mechanism deals with most subscriptions, except for “persistent” subscriptions described in part 2. The next version of knockout.composite will have a vastly improved model where subscriptions (as well as global DOM event handlers) will be tied to the life of the pane’s corresponding DOM element.

Transitions

Second, it triggers some automated visual prettiness. What’s a web framework without transitions? Currently, only basic hide / show and fade out / in transitions are implemented, but additional transitions can be implemented with ease. I’ll be implementing some of the basic CSS3 transitions and will post a guide on custom transitions soon.

Back Button and Bookmarking Support

Third, it populates our current URL hash tag with our pane path and data. Bookmarking and back button support for most applications without an extra line of code. Cool.

An observable extension that allows you to automatically persist the value of any observable in the URL is also provided.

self.selectedFolder = ko.observable().extend({ history: { key: 'folder', pane: pane } });

Passing the pane is optional but ensures the property is removed from the URL when the pane is destroyed.

Note: this extension is still being developed and there are a couple of known issues. They are minor, do not affect the API and will be fixed soon.

The Future…

It’s occurring to me as I write this that the sugar described above doesn’t necessarily need to be triggered by calling a function and can be integrated  and automated much more seamlessly. Future version.

As for this series of posts, in part 4 we’ll be putting all this into practice and building something functional.

Monday, September 03, 2012

knockout.composite: The Basics

*UPDATE* Tribe is here! Check out http://tribejs.com/ for guides and API reference.

This is part 2 of a multi-part post. From here on in, it’s assumed that you have a basic knowledge of the data binding and observability features of knockout.js. Head over to http://learn.knockoutjs.com/ and run through a tutorial or two to get up to speed, it’ll only take a minute or two.

If you’re feeling confident or short on time, you can probably skip to part 4 and get stuck into a more meaty example.

Part 1: Introducing knockout.composite
Part 2: The Basics
Part 3: Getting Around
Part 4: Putting it All Together
Part 5: Unit Testing: Model Citizens 
Part 6: Integration Testing: Playing Nicely Together
Part 7: Functional Testing: Automated UI Tests, Anywhere, Any Time
Part 8: Pack Your App and Make it Fly
Part 9: Parting Thoughts and Future Directions


knockout.composite weighs in at 19.2kb minified and 6.4kb minified and gzipped. It currently depends on jQuery 1.7.1 and knockout.js 2.1.0, though I plan to remove the dependency on jQuery in a future version. For back button support, the jQuery hashchange plugin is required.

The code in this post is based on the examples available in the source code and in the live examples. It is strongly recommended that you use Chrome to work through the examples. It is the only browser that fully supports the sourceURL tag for dynamically loaded scripts. Crack open the developer console (F12) and show the sources – full breakpoint support in all of your models, all neatly arranged with the correct names. Nice!

Creating Panes (demo)

As described in part 1, a pane consists of three resources – a HTML template, a JavaScript model and a CSS stylesheet. When a pane is created, the framework renders the template and CSS, creates an instance of the model and binds it to the template.

Creating a pane in markup is as simple as invoking the pane binding handler:

<body data-bind="pane: 'helloWorld', data: { message: 'A message to pass...' }">

The pane handler also accepts an object containing the pane options. This format allows passing additional options to the pane creation process. We’ll cover some of those options later.

<body data-bind="pane: { path: 'helloWorld', data: { message: 'A message to pass...' } }">

We can also dynamically inject panes into the DOM using a JavaScript utility method:

ko.composite.utils.addPane(document.body, {
    path: 'helloWorld',
    data: { message: 'A message to pass...' }
}, pane);

Basic Communication

Publishing and Subscribing to Messages on the Event Bus (demo)

Publish / subscribe is the primary mechanism for communication between panes. This promotes loose coupling between application components and reuse of panes. The knockout.composite codebase contains a fully functional publish / subscribe mechanism, though future versions will allow adapters to be written for other pubsub libraries.

An instance of the pubsub engine is passed to each pane, and publishing and subscribing is as simple as calling the appropriate methods:

pubsub.publish('message', self.value());
pubsub.subscribe('message', function (value) {
    self.value(value);
});

It’s important to be aware that the current version of knockout.composite contains an automatic clean up mechanism that cleans up normal subscriptions each time the pane navigates (covered next post). If you require subscriptions to persist longer than this (such as in layout components that are always visible), use the subscribePersistent method. You will need to unsubscribe these yourself, usually in the dispose lifecycle method (see below), or memory leaks will occur.

This will all change in the next version where subscriptions will be automatically removed when the pane’s corresponding element in the DOM is destroyed.

Sharing Observables (demo)

A powerful technique for keeping data synchronised across your application (particularly lists) is to pass a single instance of an observable to each consumer pane. knockout.js keeps the UI, or any subscribers to the observable up to date.

Panes, Models and Lifecycles (demo)

Lifecycle. Sometimes makes me think of WebForms. It’s far, far simpler, I promise.

Each pane and it’s associated DOM element has a life of it’s own, from creation through rendering to destruction. There are four predefined events that we can hook in to by simply defining some functions on our models:

  • initialise – this function is called immediately after the model is constructed. If we return a jQuery deferred object from this function (such as one returned by $.ajax), rendering will wait until the deferred completes, allowing us to load data before the pane is rendered.
  • rendered – called when the current pane has completed rendering and data binding the model to the template. This does not include any panes that are nested within the current pane.
  • childrenRendered – called when all panes in the current rendering cycle (children and siblings) have completed rendering and binding.
  • dispose – called when the pane’s associated DOM element has been destroyed. This is typically where you unsubscribe from any persistent event bus subscriptions or global DOM events.

The next version of knockout.composite will provide a configurable and extensible pane lifecycle.

Next…

Coming up, we’ll have a look at navigation, including memory management, transitions and bookmarking / back button support.